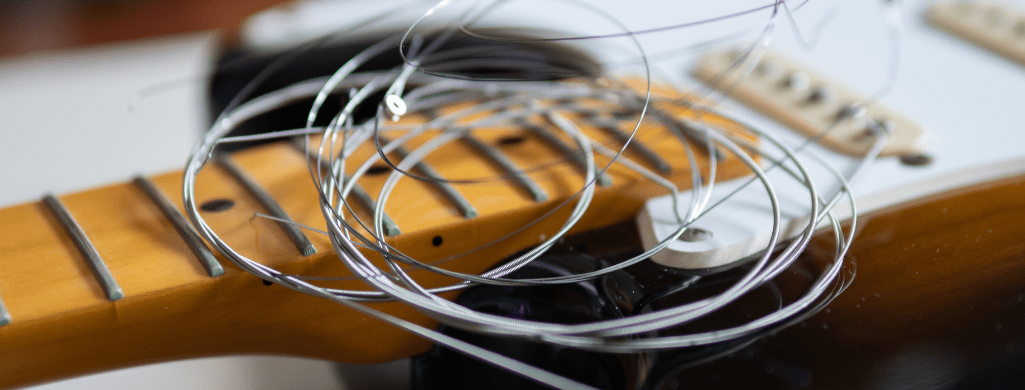
How to put on a guitar strap? Attaching a guitar strap is easy and simple. The reason you would attach a guitar strap to be able to play while in a standing position.
Below I’ll talk about different strap attachments, depending on the guitar. I’ll also talk about ways to keep your strap from falling off and potentially causing damage to your guitar mid jam session!
WHICH WAY SHOULD I ATTACH THE STRAP?
Does it matter which end of the strap you attach to each pin? It depends on the strap but for the majority of straps, yes, it does matter.
If your strap is wider on one end, this would be the end that attaches closest to the neck or headstock. This is because the wider end of the strap is supposed to sit comfortably over your shoulder.
If your strap is the same width for the full length, it’s recommended to attach the strap so the length adjustment buckle is closest to the bridge of the guitar, this will make sure the buckle is behind you and not uncomfortably resting on your shoulder.
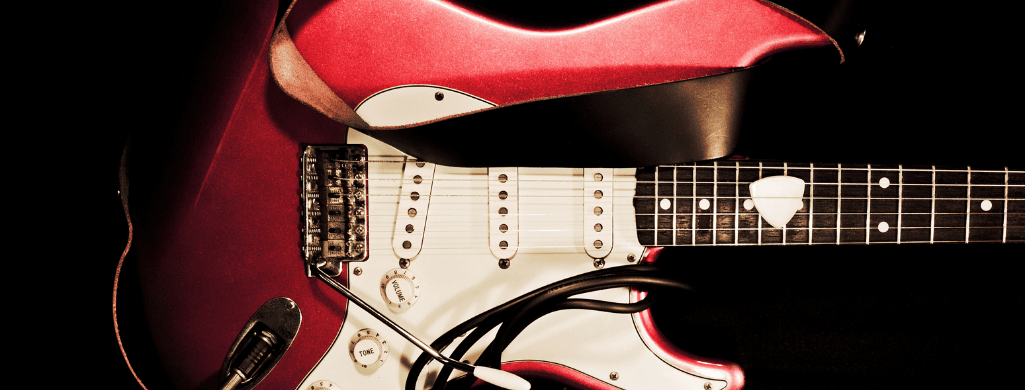
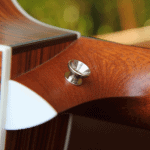
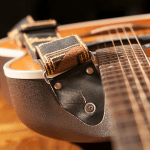
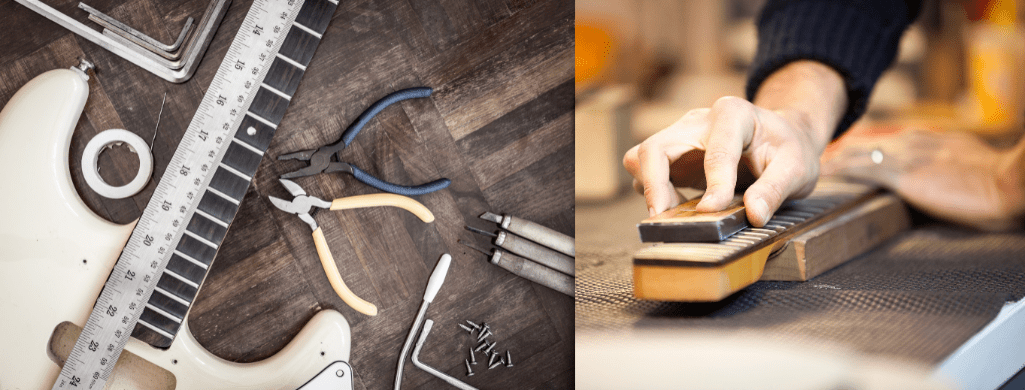
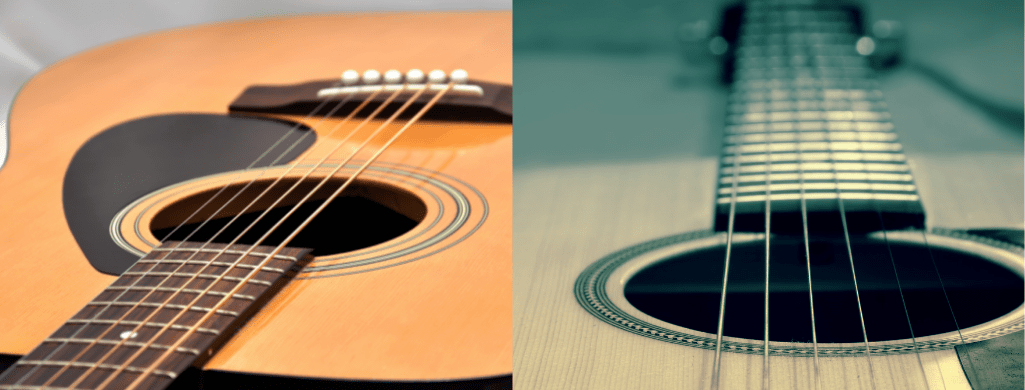
STRAP PINS
Strap pins are knobs that are screwed to a guitar body. These pins enable you to securely attach a strap to your guitar.
How To Put On A Guitar Strap? Attaching To One Strap Pin
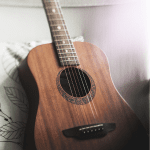
Some guitars, mainly acoustic guitars, will have only one strap pin.
To attach a strap to a guitar with one strap pin, push one end of the strap over the strap pin on the body of the guitar nearest the bridge. Make sure this end of the strap is secure and will not slip off.
To attach the other end of the strap to your guitar you will need to attach to the headstock, above the nut, using a string or strap. A leather shoe lace works well here but you can use anything that will not damage the finish of your guitar.
Insert the string, lace or strap through the hole of the guitar strap. Feed one end of the string, lace or strap UNDERNEATH the strings above the nut. Tie off securely, confirming your chosen knot does not put pressure on the strings.
How To Put On A Guitar Strap? Attaching To Two Strap Pins
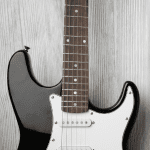
Attaching a strap to two strap pins is easier and straightforward. Most electric guitars and basses will have two strap pins.
Slip each hole on each end of your strap over the strap pins on either side of the guitar body. Make sure they are secured and cannot easily slip off. That’s it!
How To Put On A Guitar Strap? Attaching A Strap If No Strap Pins Available
Although not as common, some guitars (mainly classical) may have no strap pins at all. To attach a strap to a guitar with no strap pins you will need a special strap especially made for this type of guitar, commonly called a classical guitar strap or loop strap.
Attach near the headstock using the same method you use to attach to a guitar with only one strap pin. Use a string, lace strap to wrap or tie off above the nut on the headstock.
To attach the strap to the body, this type of strap will have some sort of a clip that will feed underneath the guitar body and clip onto the soundhole.
The downside of this strap is that it uses gravity to keep the strap attached to the body, so it’s up to you to be aware.
STRAP LOCKS
Strap locks do exactly what their name says. They lock the strap to your guitar making sure the strap cannot slip off mid jam session. I’ve had this happen myself and although I got away with only a dent in my guitar, it’s not a fun experience and can potentially do some serious damage to your guitar.
I highly recommend that you use strap locks, especially if you frequently play standing, or move a lot when playing guitar.
ADJUSTING A GUITAR STRAP
Guitar straps may have an adjustment buckle or a feed-through system.
Adjustment buckles on a strap work just like any other adjustment buckle you’ve come across. Loosen at the buckle, make it shorter or longer and tighten again.
Feed-through systems are commonly used with leather straps. Back the thinner strap completely out of the slot so you end up with two separate leather pieces. Decide which slot on the larger leather piece you need to place the smaller leather piece through. Place the smaller leather strap through the slot on the larger strap and back through itself.
HOW TO PUT ON A GUITAR STRAP? FINAL THOUGHTS
As you can see, attaching a strap to a guitar is an easy, straightforward process.
It’s a good idea to make sure to check your strap and strap pins for any damage or irregularities EVERY time you play.
Preventative inspection and maintenance will help avoid a possible accident which may damage your guitar.
Check the strap holes for wear to make sure they haven’t gotten larger, which could easily slip off the strap pins.
Check that your strap pins are not loose. It is possible for the strap pin screws to loosen up over time or possibly strip the hole they are in.
Who invented the guitar? Origins of stringed instruments go back thousands of years. No one actually knows who invented the very first guitar. We have an idea of how the guitar has evolved through history but no definitive proof of the very first guitar or who invented it. We do however know who invented what we know today as modern guitars.
In this article I’ll provide some history regarding the origins of guitars and how they evolved. I’ll also talk about who invented the modern guitars that we know today.
What we know about the origins of the guitar:
Har-Mose, an Egyptian who performed for the likes of Egyptian Queen Hatshepsut, had a three-stringed lute around 3500 years ago.
There is a 3000+ year old stone carving from the Anatolian region (present day Turkey) that shows a person playing a stringed instrument.
The lute, which was a predecessor of the modern style of guitars, was found to be used in Europe between the 6th and 9th centuries.
Five-course guitars, also known as baroque guitars, began to replace the lute as the most popular guitar beginning in the mid-16th century.
Luthiers Jose Benedit, Juan and José Pages and Francisco Sanguino were integral in creating some of the first six course guitars in existence in the latter half of the 1700s.
Gaetano Vinaccia, whose family were violin and mandolin makers, produced one of the first six stringed guitars (known as the Vinaccia guitar) in 1779 in Italy.
Antonio Torres Jurado produced guitars in the 1800s using a larger body and fan bracing. Classical guitars that followed were highly influenced by his designs.
In 1934, Adolph Rickenbacker and George Beauchamp filed the first patent for an “electrical stringed musical instrument”. The patent was granted August 10th, 1937. This was the beginning of the electric guitar.
WHO INVENTED THE ELECTRIC GUITAR?
Adolph Rickenbacker (April 1, 1887 – March 21, 1976) and George Beauchamp (March 18, 1899 – March 30, 1941) filed the patent in 1934.
WHO INVENTED THE ACOUSTIC GUITAR?
We don’t know for sure who invented it, but it was likely invented in Spain in the early 16th century.
The modern acoustic we know today can be traced to Christian Frederick Martin (January 31, 1796 – February 16, 1873), among other German-American luthiers. They created the first X-bracing for acoustic guitars in the 1840s. This bracing was important because it provided the strength to be able to use steel guitar strings.
WHO INVENTED THE BASS GUITAR?
Paul Tutmarc (May 29, 1896 – September 25, 1972) is credited with inventing the first electric bass guitar in the 1930s.
WHO INVENTED THE 12 STRING GUITAR?
There is no definitive answer to who is responsible. 12 string guitars appeared around the end of the 19th century.
WHO INVENTED THE DOUBLE NECK GUITAR?
One of the first double neck guitars was created by Nicholas Alexandre Voboam II (1634/46–1692/1704) in 1690.
WHO INVENTED THE STEEL GUITAR? (Lap Steel & Pedal Steel)
Joseph Kekuku (1874–1932) is credited with inventing the steel guitar.
WHO INVENTED THE CLASSICAL GUITAR?
Antonio Torres Jurado (1817–1892) (Modern dimensions)
WHO INVENTED THE FENDER GUITAR?
Clarence Leonidas Fender (August 10, 1909 – March 21, 1991), known as Leo, invented the Fender Telecaster in 1950 and the Fender Stratocaster in 1954.
WHO INVENTED THE 7 STRING GUITAR?
The 7 string guitar’s history goes back over hundreds of years. No one person can be attributed to being the definitive inventor.
The first modern, solid-body, 7 string electric guitar was built by Kirk Sand in 1982.
FINAL THOUGHTS ON WHO INVENTED THE GUITAR?
As you can see, guitars and more specifically fretted, stringed instruments date back thousands of years. It’s interesting to see how these guitars evolved over time.
Previous build techniques have led the way for the modern guitar designs we see today. It’s fascinating to think about what guitar designs will look like in the future. Thank you for reading.
If you like this article, please check out our latest posts:
How many frets on a guitar? Acoustic guitars have between 18 and 24 frets, the most common is 20 frets. Electric guitars have between 19 and 36 frets, the most common number of frets on electric guitars are 21, 22 and 24. Bass guitars have between 19 and 36, the most common number of frets on a bass guitar is 20.
I’ve noticed most online resources answering this question do not even mention guitars and basses with over 24 frets, which I found odd. Even though these higher fretted instruments are not as common and some are custom shop only, we feel we have to mention them in the topic of how many frets on a guitar. Below I’ll go more in depth into frets on different styles of guitars.
HOW MANY FRETS ON AN ACOUSTIC GUITAR?
Acoustic guitars have between 18 and 24 frets, the most common is 20 frets.
You may also hear acoustic guitars called either 12 fret or 14 fret guitars. Know that this DOES NOT mean the number of frets on the fretboard. This refers to where the neck is attached to the body, at either the 12th or 14th fret.
HOW MANY FRETS ON AN ELECTRIC GUITAR?
Electric guitars have between 19 and 36 frets, the most common number of frets on electric guitars are 21, 22 and 24.
Popular electric guitars and their frets:
Fender Stratocaster guitars, depending on model, will have either 21, 22 or 24 frets. 21 Frets: SRV Signature, Vintera ’50s and The American Original 22 Frets: Performer, Ultra, Acoustasonic and Player 24 Frets: HM Strat
Gibson Les Paul guitars, depending on model, will have either 22 or 24 frets. 22 Frets: Most Gibson Les Paul guitars 24 Frets: Gibson Buckethead Signature Les Paul, Gibson Les Paul Standard Double Cut Examples of guitars with 19 or more frets: 19 Frets: Godin MultiAc Grand Concert, The Loar guitars – models: LH-309, LH-600 & LH-700 (Note: these are Acoustic-Electric guitars). 20 Frets: Squier Mini Strat and Mini Jazzmaster, Heritage Standard Eagle, Godin Radiator, multiple Guild, Epiphone and Ibanez models. 21 Frets: Fender, Squier, Gibson, Taylor, Danelectro, Rickenbacker, Godin, Kramer, G&L, ESP. Plenty of manufacturers build 21 fret guitars. 23 Frets: Guild Surfliner 24 Frets: Ibanez, PRS, ESP, Schecter, Jackson, Kramer, Charvel, Ernie Ball Music Man, Strandberg and many more manufacturers build 24 fret guitars. 26 Frets: Recording King lap steel guitars. 27 Frets: Ibanez – certain Prestige models, Jake Bowen signature. Caparison Guitars – Horus and TAT models. Washburn, Hamer. 28 Frets: Gretsch – certain lap steel models 29 Frets: Washburn EC29, Gary Kramer R-29 30 Frets: Sky Guitars – multiple, Ibanez RG550XH 31 Frets: Hondo II Longhorn Vintage, 1958 Danelectro Guitarlin 32 Frets: Hondo Longhorn Guitarlin 36 Frets: Hamer, Washburn EC36, Gary Kramer R-36, Abstract Prodigy 36 38 Frets: ‘Said Too Much Productions’ 3D printed a 38 fret guitar so he could hit C8 on a guitar
HOW MANY FRETS ON A BASS GUITAR?
Bass guitars have between 19 and 36, the most common number of frets on a bass guitar is 20.
HOW MANY FRETS ON A CLASSICAL GUITAR?
Standard classical guitars mostly have 19 frets. However, there are also 20 – 24 fret models available.
HOW MANY FRETS ON A ½ SIZE GUITAR?
½ size guitars have 18-20 frets depending on make/model. Fender Redondo Mini has 18 frets. Most ½ size guitars have 19 frets. Yamaha makes a ½ size guitar with 20 frets.
HOW MANY FRETS ON A ¾ SIZE GUITAR?
¾ size guitars have 18-24 frets depending on make/model.
HOW MANY FRETS ON A BARITONE GUITAR?
Most acoustic baritone guitars will typically have 20 frets. Most electric baritone guitars have 22 or 24 frets.
HOW MANY FRETS ON A FLAMENCO GUITAR?
The most common fret number for Flamenco guitars is 19.
HOW MANY FRETS ON A CIGAR BOX GUITAR?
Many cigar box guitar builds have either 17 or 19 frets. However, there are cigar box guitars with upwards of 24 frets as well.
HOW MANY FRETS ON A LES PAUL GUITAR?
As mentioned above, most Gibson Les Paul guitars have 22 frets. However, they did make some models with 24 frets such as the Gibson Buckethead Signature Les Paul and the Gibson Les Paul Standard Double Cut.
WHY DO ELECTRIC GUITARS HAVE MORE FRETS THAN ACOUSTIC GUITARS?
Since acoustic guitars produce their own sound they are built specially for tone. The number of frets, body size, scale length and other factors all affect resonation. This isn’t an issue with electric guitars as they have their sound produced through passive or active pickups and a guitar amplifier.
WHAT ARE GUITAR FRETS?
Guitar frets are metal strips inserted on the fretboard of a guitar or stringed instrument. Each fret represents one semitone. The importance of frets is so you do not have to be exact with your finger placement to play the correct note.
What are guitar frets made of?
There are two main types of fret wire:
Nickel silver, don’t be fooled, it doesn’t contain any silver. They are made up of a mixture of copper, nickel and possibly zinc or other trace amounts of metal materials.
Stainless steel, self-explanatory but harder for luthiers to work with and more costly, both in materials and labor.
Fret wire sizes:
6230 – Vintage frets (smallest) – .078″ x .043″ 6105 – Modern narrow and tall – .090″ x .055″ 6150 – Vintage jumbo – .102″ x .042″ 6130 – Medium Jumbo – .106″ x .036″ 6100 – Jumbo – .110″ x .055″
FINAL THOUGHTS ON – HOW MANY FRETS DOES A GUITAR HAVE?
For most guitarists, the standard of 20 frets for an acoustic or 21-24 frets for an electric is sufficient. Only if you need to play a specific piece you would otherwise be unable to play do you really need to start looking at 24+ fret guitars.
To expand the amount of tones you are able to play, I would sooner recommend a 7 or 8 string guitar over say a 36 fret guitar. I hope this helps, thanks for reading!
Straightforward and simple answer to how many strings does a guitar have? Acoustic or electric guitars have at least six strings. Bass guitars have at least four strings.
If that’s all you needed to know, thanks for reading! However, if you’d like to learn more regarding some nuances to this question as well as different types of guitars and guitar related instruments, keep reading below.
HOW MANY STRINGS DOES AN ACOUSTIC GUITAR HAVE?
Six-String Acoustic Guitar
An acoustic guitar, as we know it today, has at least six strings. Standard tuning of an acoustic guitar is E A D G B E.
Seven-String Acoustic Guitar
Also known as a Russian or Gypsy guitar. They are usually tuned to open G tuning (D G B D G B D).
Twelve-String Acoustic Guitar
Twelve strings, each of the six strings (E A D G B E) is doubled up (E E A A D D G G B B E E). However, each of the four lower pairs of tunings E A D G, have one string in the lower octave and one in a higher octave. The pairs of tunings for the higher B and E strings are tuned in the same octave.
HOW MANY STRINGS DOES AN ELECTRIC GUITAR HAVE?
Six-String Electric Guitar
Just like the acoustic guitar, electric guitars have at least six strings. However, there are also seven and eight string guitars. Standard tuning of an electric guitar is E A D G B E.
Seven-String Electric Guitar
Have an extra lower string, usually tuned to B or C.
Eight-String Electric Guitar
Have the lower string added just like the seven string guitar but they also have a higher string, usually tuned to A.
Twelve-String Electric Guitar
Same explanation as the acoustic twelve string guitar. Twelve strings, each of the six strings (E A D G B E) is doubled up (E E A A D D G G B B E E). However, each of the four lower pairs of tunings E A D G, have one string in the lower octave and one in a higher octave. The pairs of tunings for the higher B and E strings are tuned in the same octave.
Double and Multiple-Neck Electric Guitars
Common setups are one six sting neck and one twelve string neck. However, Rick Neilsen from the band Cheap Trick has different multi-neck guitars from two all the way up to nine!
HOW MANY STRINGS DOES A BASS GUITAR HAVE?
Four-String Bass Guitar
Bass guitars have at least four strings. That being said, there are also five and six string bass guitars. Standard tuning of a bass guitar is E A D G.
Five-String Bass Guitar
Five string bass guitars have an extra lower string. Usually tuned to B.
Six-String Bass Guitar
Six string bass guitars have the extra lower B string as well as an extra high string, usually tuned to C.
HOW MANY STRINGS DO GUITAR RELATED INSTRUMENTS HAVE?
Ukulele
Commonly has four strings. Standard tuning is G C E A.
Mandolin
Most mandolins have eight strings but there are also ten and twelve string mandolins.
Banjo
Banjos have four, five or six strings.
Lap-Steel Guitars
These guitars are commonly six stringed, although some have eight. Their bodies are smaller than standard electric guitars and are open-tuned.
Pedal-Steel Electric Guitars
Similar in some ways to the lap-steel, these are the guitars with the smooth sliding twangy sound that you hear in countless country songs.
Different variations have been made in single, double or triple fret boards with six to fourteen strings.
Touch Guitar
Have either eight or ten strings and a range of over five octaves.
Harp Guitar
In addition to a more standard guitar neck. A harp guitar also contains unstopped open strings like you would see on a harp.
Common setups are six standard strings and either five or six harp strings.
FINAL THOUGHT
Once again to answer the questions of how many strings does a guitar have? The simplest answer is at least four. Standard acoustic and electric guitars have six. Standard bass guitars have four. An in-depth answer needs context, hopefully we have provided that here. Thanks for reading!
How to hold a guitar pick? If you’re reading this, we’ll assume you are just starting out your journey as a guitarist, congratulations! You’ve made the decision to learn and enjoy this passion that will be rewarding for life and in return, give you back so much more than you put into it.
What is the BEST answer to the question of how to hold a guitar pick? The short answer is: whichever way is the most comfortable. This may seem silly, obvious or unproductive but it’s the truth.
For example, Brian May of Queen is known for using a sixpence coin for a guitar pick. The reason I bring this up is because he used to use picks that have more bend and decided he liked a more rigid feel. To make effective use of this sixpence pick however, Brian stated: “I changed the way that I held the pick, sort of bending one of the fingers around, and I never went back from that point.”
Remember Brian Mays’ words if someone were to tell you that you MUST hold a pick a certain way. It’s not true, you need to be comfortable. Every person’s hands, fingers, strength, flexibility and skill level are different. It makes sense that there would not be one definitive way of how to hold a guitar pick.
Another important note is that you are not required to use a pick at all! Plenty of guitarists use techniques such as hand strumming and/or fingerstyle and never even touch a pick. These ideas/techniques will be covered in another article.
Below I’ll explain the basics of how to hold a guitar pick, some tips and tricks, answer some questions and hopefully by the end you’ll have a good understanding of how to hold a guitar pick that will be comfortable and support your play style now and in the future.
HOW TO HOLD A GUITAR PICK – BASICS
The process is simple:
The pick is held between your thumb and forefinger on your strumming hand. Right hand for standard guitars, left hand for, you guessed it, left-handed guitars (less common).
The tip of the pick should face 90 degrees from your thumb.
How much of the pick is exposed is your preference. Begin with a small amount, around 1 cm protruding and adjust based on your comfort level.
Grip strength is important! You want to make sure the pick does not slip but you don’t want to hold it like your life depends on it. The goal is control without hand cramping or fatigue. You will also have to adjust your grip strength on the pick depending on if you are picking or strumming. Picking will require a bit more grip strength than strumming. You’ll notice strumming with a tight grip is not smooth as you want the pick to float on the strings.
The most important aspect of holding a pick is comfort
HOW TO HOLD A GUITAR PICK – TECHNIQUES, REALLY?
You may have heard of several different pick holding techniques such as:
The fist method
The pinch method
The O method
Do not be overwhelmed or confused by these techniques and their names. They are NOT definitive for certain styles, nor is there any reason to adhere to one over the others. The information out there regarding these techniques is just altering pick or finger positions slightly.
Some websites are trying to say that one of these techniques is better for thinner picks, etc… This is utter nonsense. As I touched on earlier, hands, fingers, strength and flexibility are different for everyone and what works well for one person, may not work well for others.
I’ll emphasize again, the most important aspect of holding a guitar pick is comfort.
HOW TO HOLD A GUITAR PICK – PRO TIPS
To show again that there are multiple ways of how to hold a guitar pick and none are wrong, I’ve compiled a few videos so you can see how different professionals hold their picks. I’m not saying you should hold your pick like any of these professionals but it’s interesting to see how effective these different styles are.
Eddie Van Halen – No introduction needed… But seriously, if you aren’t aware, Eddie Van Halen was the lead guitarist of the band Van Halen which he founded with his brother Alex in 1972. He is regarded as one of the greatest rock guitarists of all time.
Eddie holds his pick between his thumb and middle finger with little support from his index finger. When asked about this technique Eddie said that his mom had bought him a guitar book and that book showed an image of holding the pick between your thumb and index finger and he just couldn’t do it. “Well, I couldn’t, for the life of me, hold it like that. It was very uncomfortable, and I felt like I had absolutely no control of the pick.”
Regarding which way to hold a pick, Eddie says: “Bottom line is, and I say this a lot, do whatever works best for you.”
Michael Angelo Batio – Formerly the lead guitarist of the heavy metal band Nitro. Touring guitarist for the band Manowar. Voted No. 1 Fastest Guitar Shredder of All Time” by Guitar One Magazine in 2003.
Michael Angelo Batio when asked about his picking was quoted as saying, “”I was lucky – I did it by accident, but then I analyzed it, and realized why it works.” However, he also mentions, “”If you ever watch my teaching, I never tell another guitar player to play like me. I say, what I do is similar to other great guitar players, and you have a choice of two ways or a combination of both. But I never tell anybody to play like me.”
Marty Friedman – Best known for being the lead guitarist of the band Megadeath from 1990-2000.
When asked about his picking style, he mentions, “”I really have no idea. It’s like I hold my hand upside down or something. And I don’t really know the origin of it, there’s no real reason behind it. It just happened.”
FINAL THOUGHT
Try different picks, grips, positions and angles. Choose a grip that’s comfortable for you. We hope this article was helpful and informative. Get shredding!
If you enjoyed this article, please check out our latest posts:
Interested in using thumb on guitar? Can you use your thumb(s) to play guitar? The answer, regardless of which hand, is YES. The thumb on your fret hand can be used to play chords such as D/F#. The thumb on your right hand can be used in fingerstyle or finger-picking guitar.
In this article, we will talk about the history and techniques related to using your thumb to play guitar. We also provide some examples of musicians and songs which utilize these techniques.
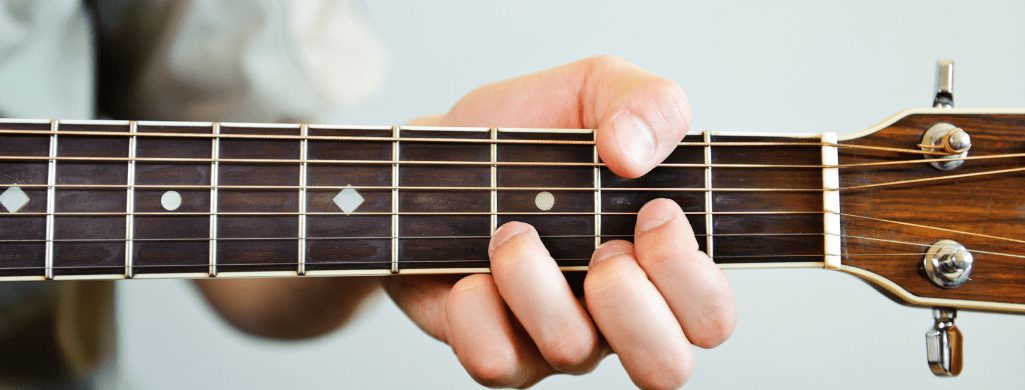
Using Thumb on Guitar – Fret Hand (Thumb-over method)
History
The thumb on your fret hand can be used to assist with chords as well as dampen or mute the E string. Barre chords or slash chords are where this is most useful.
This technique has been used since the late 19th century with the introduction of steel-stringed guitars. These guitars had narrower necks than the previous classical style which enabled more use of this thumb-over technique.
Violinists/fiddlers have used this technique in their performances for centuries.
Problems/Issues
Some people may find this difficult due to the following reasons:
Hand size
Hand/thumb flexibility
Goes against the “proper” way to hold a guitar neck
Uncomfortable
Can slow down chord changes
Other fingers may unintentionally mute strings
The good news, however, is that most of these problems can be resolved with plenty of practice or hand stretches. Getting a guitar with a thinner neck will also make this much easier.
Guitarists
Notable guitarists who use the thumb-over chord technique:
The thumb on your strumming hand can be used for fingerstyle, plucking, strumming, and muting.
These techniques have been used since the invention of stringed instruments in the guitar family and are commonly used every day.
Problems/Issues
Some people may find these techniques difficult due to the following:
Hand size
No callus on the thumb
Thumb nail is too long
Hand/thumb flexibility
Uncomfortable
As with the issues on your fret hand, these issues can generally be resolved with practice and stretching.
Guitarists
Notable guitarists who use this technique:
Tommy Emanuel
Chet Atkins
Michael Hedges
Alex De Grassi
FAQ
Is it okay to play guitar with your thumb?
Yes. Playing guitar with your thumb on either hand is perfectly fine. You need to gauge your comfort level and play the way that feels most natural.
What is the proper thumb position for guitar?
Thumb position will change due to what you’re playing. The goal should be good support with the ability to change chords easily and efficiently. Hand size will play a role here, so you will have to experiment where your thumb feels comfortable.
Can I strum with my thumb?
Yes. Not only can you strum with your thumb, but this is also a great way to build callus and strength in your thumb for easier finger-style playing.
Why does my thumb hurt when I play guitar?
The most logical reasons for thumb pain are lack of strength or pushing too hard on the fretboard. Build your strength by practicing different guitar fingerings and chord changes. Learn to only push as hard as needed to play the note.
If you enjoyed this article, please check out our latest posts:
If you’re torn between Elixir Polyweb and Nanoweb strings, you’re not alone. It’s one of the most common questions Elixir players ask — and the answer isn’t the same for everyone.
We’ve played both extensively across acoustic and electric guitars, across genres from clean fingerpicking to heavy rhythm work. Here’s everything you need to know to make the right choice.
Quick Answer: Polyweb vs Nanoweb
Choose Polyweb if you want a warm, mellow tone with a fast, slick feel under your fingers. Great for fingerstyle, blues, country and players who find bright strings fatiguing.
Choose Nanoweb if you want a brighter, more natural-sounding tone that feels closer to uncoated strings. Better for rock, pop, strumming and players who want that crisp attack.
Our pick: For most guitarists we recommend Elixir Nanoweb — the brighter tone and more natural feel make it the more versatile choice across playing styles and genres.
What Are Elixir Strings?
Elixir pioneered coated guitar strings and remains the market leader. Their strings use an ultra-thin polymer coating over the string windings that protects against corrosion, sweat, dirt and humidity — dramatically extending string life compared to uncoated strings.
Both Polyweb and Nanoweb use this same core technology. The difference is the thickness of the coating — and that single difference has a significant impact on tone and feel.
Polyweb Strings – Warm Tone, Slick Feel
Polyweb was Elixir’s original coating, developed after extensive testing with over 15,000 guitarists. It uses a thicker polymer coating that wraps around the string windings without filling the gaps between them — which is critical for preserving vibration and tone.
Polyweb Tone
Polyweb strings have a warm, mellow, “played-in” sound from the moment you put them on. If you’ve ever loved the tone of a set of strings after they’ve been played for a few weeks — that broken-in warmth — that’s what Polyweb sounds like right out of the packet.
This makes them excellent for styles where a warm, rounded tone is desirable — blues, jazz, country, fingerstyle and classic rock. They’re also forgiving on guitars that are naturally bright or harsh sounding.
Polyweb Feel
The thicker coating gives Polyweb strings a distinctly slick, fast feel. Your fingers glide across them with very little friction — which reduces finger squeak significantly and makes fast playing feel effortless.
Some players love this. Others find it feels slightly artificial or slippery compared to uncoated strings. It’s worth trying a set before committing if you’ve never played coated strings before.
Polyweb Acoustic String Gauges
Extra Light
.010 – .047
Custom Light
.011 – .052
Light
.012 – .053
Light-Medium
.012 – .056
Medium
.013 – .056
Polyweb Electric String Gauges
Super Light
.009 – .042
Custom Light
.009 – .046
Light
.010 – .046
Medium
.011 – .049
Nanoweb Strings – Bright Tone, Natural Feel
Nanoweb was Elixir’s refinement of the Polyweb formula — a thinner, more advanced coating that gets closer to the feel and tone of uncoated strings while still providing the same long-lasting protection.
Nanoweb Tone
Nanoweb strings are noticeably brighter than Polyweb. The thinner coating allows more of the string’s natural resonance to come through, giving you that crisp, clear attack you’d expect from a fresh set of uncoated strings — but with significantly longer lifespan.
This makes Nanoweb a better choice for rock, pop, country picking, strumming and any style where you want definition and clarity in your tone. They work particularly well on acoustic guitars where you want the full, natural projection of the instrument to come through.
Nanoweb Feel
Nanoweb strings feel much closer to uncoated strings than Polyweb. They’re smooth but not slippery — most players who try Nanoweb for the first time barely notice the coating at all, which is exactly the point.
If you’ve avoided coated strings because you don’t like the artificial feel, Nanoweb is worth trying. It’s the coating that’s most likely to convert uncoated string players.
Nanoweb Acoustic String Gauges
Extra Light
.010 – .047
Custom Light
.011 – .052
Light
.012 – .053
Light-Medium
.012 – .056
Medium
.013 – .056
HD Light
.013 – .053
Nanoweb Electric String Gauges
Super Light
.009 – .042
Custom Light
.009 – .046
Light
.010 – .046
Light-Heavy
.010 – .052
Medium
.011 – .049
Heavy
.012 – .052
Polyweb vs Nanoweb – Head To Head Comparison
Polyweb
Nanoweb
Tone
Warm, mellow, played-in
Bright, clear, natural
Feel
Slick, fast, smooth
Natural, close to uncoated
Coating thickness
Thicker
Thinner
String life
Excellent
Excellent
Best for
Blues, jazz, fingerstyle
Rock, pop, strumming
Best for players who…
Want warmth & speed
Want natural tone & feel
Why Choose Coated Strings At All?
Before deciding between Polyweb and Nanoweb, it’s worth understanding why coated strings are worth the slightly higher price point over uncoated alternatives.
Longer string life — Elixir strings typically last 3-5x longer than uncoated strings. If you play regularly, you’ll change strings far less often.
Consistent tone — uncoated strings lose their brightness within days of playing. Elixir strings maintain their tone for weeks or months.
Less finger squeak — the coating dramatically reduces the squeaking sound when sliding up and down strings, which is particularly noticeable in recordings.
Better for sweaty hands — if your hands sweat a lot when playing, uncoated strings corrode quickly. Elixir strings handle this much better.
Cost effective long term — despite costing more per set, you buy them far less frequently which usually works out cheaper over time.
Who Should Choose Polyweb?
Polyweb is the right choice if any of these apply to you:
You play blues, jazz, country or fingerstyle and want a warm, rounded tone
You play fast lead guitar and want strings that feel frictionless under your fingers
You find new strings too bright or harsh and prefer a broken-in sound immediately
You have a naturally bright-sounding guitar you want to tame slightly
You play long sessions and want maximum string comfort
Both Polyweb and Nanoweb are excellent strings — Elixir’s quality control is consistently outstanding and either choice will last significantly longer than uncoated alternatives.
For most guitarists we recommend starting with Nanoweb. The brighter, more natural tone and feel makes it the more versatile option and the easier transition if you’re coming from uncoated strings. It’s also Elixir’s best seller for good reason.
If you specifically play styles where warmth is a priority — blues, jazz, fingerstyle — or if you’ve tried Nanoweb and found it too bright, then Polyweb is absolutely worth trying. The slick feel alone converts many players permanently.
The good news is both are reasonably priced and worth trying a set of each to find your preference. Most guitarists who try both end up with a clear favourite they stick with for life.
Frequently Asked Questions
Are Polyweb strings still made?
Yes — Elixir still makes Polyweb strings. However they have reduced the range compared to Nanoweb, so gauge options are more limited particularly for electric guitar.
Do Elixir strings last longer than regular strings?
Yes — significantly longer. Most players report Elixir strings lasting 3-5x longer than uncoated strings of equivalent quality. How long depends on how often you play, how much you sweat and how you store your guitar.
Which Elixir strings are best for acoustic guitar?
For acoustic guitar we recommend Nanoweb in most cases — the brighter tone complements the natural resonance of an acoustic better than Polyweb. If you play fingerstyle exclusively, Polyweb’s warmer tone and slick feel may suit you better.
Which Elixir strings are best for electric guitar?
For electric guitar Nanoweb is generally the better choice — the brighter tone works better with most electric guitar pickups and the feel is closer to the uncoated strings most electric players are used to.
Can I use Elixir strings on bass guitar?
Yes — Elixir makes Nanoweb bass strings. They’re excellent for bass and provide the same extended life and consistent tone as their guitar strings.
This is our review for the best guitar finger strengthener.
Hand exerciser, guitar finger strengthener, finger exercise tool. Different names, same application. If you are looking to build hand and/or finger strength, these tools can be extremely useful. However, we recommend building finger strength actually playing the guitar. There is no substitute for this, PLAY THE GUITAR!
In situations where playing your guitar is not possible, these become a great second option for finger strength. They are small, portable and packable. You can use them at work, on the road, at home, almost anywhere and anytime which makes them very practical.
After reviewing multiple guitar finger strengthener tools, we have chosen the D’Addario Varigrip as our pick. This is due to the adjustable resistance and the simulated strings for callus building. We find that geared towards guitarists, this is the best option.
If you are looking for a finger exercise tool for therapy/rehab, we found the PROHANDS product lineup to be the best as they cater specifically to this purpose.
Below you will find our reviews for the best guitar finger strengthener.
The D’Addario Varigrip is the only guitar finger strengthener on our list that is produced from a guitar-related manufacturer. Although most finger/hand exercisers operate in similar a way by providing resistance to individual fingers.
We think that a company in the guitar-related industry creating this product really shows who they have geared the design and function towards.
What we like about this guitar finger strengthener
The variable tension that is adjustable for each individual finger is great. No need to have to set all tensions the same if you have one or two fingers lacking or if you have a predominately strong single finger.
The ergonomic design ensures you are getting the most benefits from your finger exercises without using a level of grip strength that is not required.
By removing the palm padding, you get access to the molded, simulated guitar strings to help build and maintain calluses. We like this very much as it adds another level of usage that was well thought out.
What we don’t like:
There is no mention of exactly what the range of variable resistance is. We’ve found a lot of info that states either: “2-4 lbs” or “2-5 lbs”. However, the manufacturer does not clarify.
The Dynatomy Varigrip Sport is based off the same design as the D’Addario Varigrip. We like the D’Addario very much and we feel the same about the Dynatomy.
What we like about this guitar finger strengthener:
Again, the variable resistant adjustment is highly beneficial. The Dynatomy Varigrip Sport comes in two different resistance variations:
Medium – Extra-Heavy: 6-9 lbs variable, adjustable resistance
Although not dedicated towards guitar players, the Digi-Flex Hand Exerciser is an effective tool with multiple resistances available.
What we like about this guitar finger strengthener:
Solid build, no issues with stuck plungers or pinched fingers. This is important as this device is labeled as a therapy tool. Quality and ease of use were well though out here.
Available in six different resistance levels:
Yellow: 1.5 lbs
Red: 3 lbs
Green: 5 lbs
Blue: 7 lbs
Black: 9 lbs
Grey: 11 lbs
What we don’t like:
Take it with a grain of salt, but for monetary reasons, we prefer a variable finger exerciser as there is no need to buy all six to have a variable resistance range.
Claiming to be “the original spring-loaded hand and finger exerciser”, PROHANDS Gripmaster is said to be used by professional athletes, musicians as well as a rehab tool. The design is similar to the Digi-Flex and has has different un-adjustable resistant levels depending on the device.
What we like about this guitar finger strengthener:
The PROHANDS hand exercisers are comfortable and well-built.
PROHANDS has four different product lines for their hand exercisers:
VIA: 1 lb – 6 lbs (Gray = 1 lbs, Green = 2 lbs, Yellow and Pink = 4 lbs, Blue, Purple and Black = 6 lbs)
Gripmaster: 1.5 lbs – 9 lbs (Green = 1.5 lbs, Yellow = 3 lbs, Blue = 5 lbs, Red = 7 lbs, Black = 9 lbs)
Gripmaster Rehab: 0.75 lbs – 9 lbs (Tan = 0.75 lbs, Yellow = 1.5 lbs, Red = 3 lbs, Green = 5, Blue = 7 lbs, Black = 9 lbs)
Important to note is that the VIA and Gripmaster product lines are smaller and may be better suited to small/average size hands. If you have large hands you’ll be better off with the Pro version.
What we don’t like:
Although they’ve created a wonderful lineup of different product lines and resistances. We believe this may be overwhelming for someone who just wants to increase basic finger strength.
Available in a four or five finger configuration, the Django Hand Exerciser is a variable resistance plunger type finger strengthener.
What we like about this guitar finger strengthener:
Great build quality, doesn’t feel cheap. This is a nice benefit, especially in a variable resistance version. Everything seems tight and gives us the impression it will last.
The adjustable resistance gives you the ability to change the tension between 3-7 lbs.
What we don’t like:
If you have large hands or strong fingers the maximum tension of 7 lbs may not be enough.
Guitar Finger Strengthener FAQ
How often can I or should I use these?
A guitar finger strengthener can be used everyday, even multiple times a day as long as you feel no pain or discomfort.
For how long per session am I able to use these?
There is no set amount of time, whatever you feel comfortable with. We recommend starting out with a few minutes and see how it feels. Gradually increasing your time of use is the best course of action here,
Do I need to use a guitar finger strengthener?
The short answer is no. These hand and finger exercisers are not a requirement. They are a tool that helps increase your finger and hand strength more effectively than building that strength naturally through playing the guitar.
Conclusion
The benefits of portability, adjustable resistance and callus builder make our choice for the D’Addario Varigrip as the best guitar finger strengthener as easy one.
A final note, if you feel as though the resistance from any hand/finger exercise tool is too low, simply add repetitions. No need to purchase multiple different units for a variety of resistance levels unless that is your preference or recommended by your physician for rehab.
Do you use a hand or finger exerciser? Let us know! Thanks for reading.
If you enjoyed this article, please check out our most recent posts:
The BOSS BD-2 Blues Driver and the Ibanez TS9 Tube Screamer are two of the most iconic overdrive pedals ever made. Between them they’ve appeared on thousands of records, powered countless live rigs, and started more arguments on guitar forums than just about anything else.
They’re both overdrive pedals. They’re both affordable. They’ve both stood the test of time. But they do not sound the same, they don’t behave the same way in a signal chain, and the one that’s right for you depends entirely on what you’re trying to do.
We’ve used both — the Tube Screamer extensively, both hardware and as a plugin, the Blues Driver as a plugin across multiple amp sims. Here’s an honest breakdown with no fluff.
The Blues Driver has been in production since 1995 and it’s not hard to see why BOSS has kept it in the lineup. It delivers a warm, thick overdrive that sits somewhere between a pushed clean tone and full distortion — closer to what you’d get from a cranked vintage amp than a modern high-gain pedal.
What it actually sounds like
The BD-2 has warmth. Real warmth, not the marketing department kind. The low-mids are full and present, the attack is soft enough that it doesn’t feel harsh, and there’s a natural sag to the response that makes single notes feel alive rather than clinical.
The flip side of that warmth is that the Blues Driver can get muddy — particularly if you’re running it into an already warm amp, using humbuckers, or pushing the gain past the halfway point. The low-end build-up is the BD-2’s most common complaint and it’s a legitimate one. Players who use it successfully tend to keep the gain conservative and use the tone knob to tighten things up.
Controls
Three knobs: Level, Tone, Gain. Simple.
A common approach among experienced BD-2 users is to set both the Level and Gain high — almost maxed — and then back off just enough to find the sweet spot for their specific guitar and pickup combination. This approach works better with single coils than humbuckers, which tend to push the low-end into muddy territory more quickly.
Who it suits
The BD-2 is best suited to players who want a natural, amp-like overdrive with some character. It rewards playing dynamics well — dig in and it breaks up, back off and it cleans up. Blues, classic rock, country and indie players tend to get the most out of it. Heavy rock and metal players generally find it too loose in the low end.
Best for: Blues, classic rock, country, indie Less suited for: High-gain rock, metal, players who need tight low-end Gain range: Low to medium — this is not a high-gain pedal
The Tube Screamer is one of the most copied circuits in pedal history. The original TS808 came out in the late 1970s, the TS9 followed in 1982, and the basic circuit has been cloned, modified and referenced by hundreds of builders since. The reason it keeps getting copied is simple — it works.
What it actually sounds like
The defining characteristic of the Tube Screamer is its mid-range hump. It cuts low-end and boosts mids, which is the opposite of what many overdrive pedals do. This makes it sound thinner in isolation but cuts through a band mix like almost nothing else.
The overdrive on the TS9 is smooth rather than gritty. It’s a compressed, harmonically rich drive that’s instantly recognisable once you know what you’re listening for. Stevie Ray Vaughan used it into cranked Fender amps to get that singing, sustained blues-rock tone. The pushed, slightly compressed feel with sustain that blooms on lead lines — that’s the Tube Screamer.
One of the most effective ways to use the Tube Screamer is with the drive turned low — sometimes almost off — and the level cranked. Used this way it acts as a clean boost with a mid-range push that drives your amp into natural breakup rather than adding its own clipping. This is arguably its most powerful application and it’s how many professionals actually use it live.
Controls
Three knobs: Overdrive, Tone, Level.
The Overdrive knob is more useful at lower settings than many players expect. Don’t dismiss it because it sounds thin at high gain settings — that’s not what it’s designed for. Back the drive off, push the level, and let your amp do the work.
Who it suits
The TS9 is more versatile than it gets credit for. It suits blues and rock players as a standalone overdrive, but it also works exceptionally well as a boost in front of an already driven amp — tightening the response and pushing the mids into the mix. If you’re playing rock with a tube amp running at moderate gain, the Tube Screamer as a boost is one of the most effective sounds in guitar.
Best for: Blues, rock, pushing a tube amp into overdrive Less suited for: Players who want a flat EQ response, metal with tight low-end Gain range: Low to medium — excels as a boost
The most useful way to understand the difference between these two pedals is through their EQ character rather than their gain structure.
The Blues Driver is relatively flat in frequency response — what you put in is roughly what comes out, just with more grit and warmth. If your guitar sounds dark, the BD-2 will sound dark. If it sounds bright, the BD-2 will be bright. This makes it transparent and natural, but it also means any problem frequencies in your signal get amplified along with everything else.
The Tube Screamer actively shapes the frequency response. It cuts low-end (reducing mud), boosts mids (adding presence and cut), and rolls off harsh high treble. This is why it sounds so good in a band mix — it carves out exactly the frequency range where a guitar needs to sit.
For players who want a pedal that makes their tone sound more like itself, the Blues Driver is the right choice. For players who want a pedal that makes their tone cut through a mix, the Tube Screamer is harder to beat.
Can You Use Both?
Yes — and many players do. A common and effective combination is the Tube Screamer first in the chain as a clean boost (low drive, high level), followed by the Blues Driver for actual overdrive tones. The TS9 tightens the low-end going into the BD-2 and reduces the mud problem significantly.
That said, if you’re only buying one — read below.
Which Should You Buy?
Buy the Blues Driver if:
You want a natural, amp-like overdrive with warmth and character
You play blues, classic rock or country
You use single-coil pickups
You want a pedal that responds well to your picking dynamics
You’re running into a clean or slightly dirty amp
Buy the Tube Screamer if:
You want a pedal that cuts through a band mix
You want to boost a tube amp into natural breakup
You play rock and want smooth, compressed overdrive
You record and want a pedal that sits in a mix without EQ surgery
You want the more versatile of the two
Our preference: The Tube Screamer. The mid-range character and the ability to use it as a transparent boost make it the more flexible tool for rock playing. The Blues Driver is a great pedal but it requires more care with gain staging and amp matching to avoid the mud problem. The Tube Screamer is more forgiving and more consistently useful across different rigs.
Is the Blues Driver better than the Tube Screamer?
Neither is objectively better — they do different things. The Blues Driver is warmer and more amp-like. The Tube Screamer is tighter and cuts better in a mix. For rock playing, most guitarists find the Tube Screamer more useful. For blues and classic rock with a clean amp, the Blues Driver is hard to beat.
Can the Tube Screamer do high gain?
Not really. The TS9 is a low-to-medium gain overdrive. At high gain settings it can sound compressed and thin. It excels at low drive settings, particularly as a boost in front of an already driven amp.
Can the Blues Driver do metal?
Not well. The loose low-end and warm character of the BD-2 doesn’t suit tight, high-gain metal tones. For metal you’d be better served by a dedicated distortion pedal with tighter low-end response.
Are there better alternatives to both?
Yes, depending on your budget. The Ibanez TS808 is the original Tube Screamer circuit and many players prefer it to the TS9. The Fulltone OCD is a popular alternative to the Blues Driver for players who want a more versatile overdrive. Both the TS9 and BD-2 remain excellent choices at their price point — they’ve survived decades for good reason.
Do these pedals work with amp simulators?
Yes — both work well with amp sims and are widely used in DAW-based rigs. The Tube Screamer in particular is extremely popular for recording, either as a hardware pedal going into an interface or as a plugin. The mid-range character that helps it cut in a live mix is equally useful when recording.
If you’ve enjoyed this article, please check out our latest posts:
The action on a guitar — the distance between the strings and the fretboard — is one of the most important factors in how easy a guitar is to play. High action means you have to press harder to fret notes, which causes finger fatigue, slows down chord changes, and makes barre chords genuinely painful for beginners.
Low action fixes all of that. Strings closer to the fretboard require less pressure, less effort, and allow you to build technique faster without fighting your instrument.
This guide is aimed at beginners and players specifically looking for an acoustic with low, comfortable action out of the box. We’ve researched player feedback extensively from guitar communities and forums to give you an honest picture of each guitar — not just the manufacturer’s claims.
One Important Thing To Know First
No two guitars from the same production run will have identical action. Even within the same model, action can vary from unit to unit depending on how the guitar was set up at the factory. This is normal for mass-produced instruments.
What we’re looking for here are guitars from brands and models that consistently set up well — brands with a reputation for factory setups that don’t need immediate correction. If you buy online and the action feels high, a basic setup from a guitar tech ($40-70) can transform a good guitar into a great one. Don’t write off a guitar just because the out-of-box setup isn’t perfect.
With that said, here are the best acoustic guitars with low action for beginners and players who prioritise playability.
The Fender CD-60S is consistently recommended as the best beginner acoustic guitar at its price point, and the action is a major reason why. Fender specifically designed this guitar with a “Comfort Neck Carve” — a slim neck profile with rolled fretboard edges that makes it noticeably easier to play than most guitars in this price range.
The solid spruce top is a genuine standout at this price. Most guitars under $250 use laminate tops throughout — the CD-60S uses solid spruce, which improves both tone and resonance and means the guitar will continue to open up and improve with age as the wood matures.
What players actually say: The CD-60S is widely praised for its consistent action and intonation across the fretboard — something that is genuinely unusual at this price point. Multiple reviewers note that the action remains consistent past the 7th fret, where budget guitars typically start to rise uncomfortably. MusicRadar found that out of the box the intonation was accurate and the action was low without causing fret buzz, even when tuning down. The main honest criticism is that the tone, while decent, doesn’t quite have the warmth and fullness of more expensive guitars — but for a beginner, the playability far outweighs the tonal limitations.
Who this suits: Beginners of all ages who want a guitar that’s comfortable to play from day one without needing a setup. Also a good choice as a travel or backup guitar for more experienced players.
Worth knowing: The CD-60S comes in a spruce top and all-mahogany version. The spruce version is slightly brighter, the all-mahogany slightly warmer — both have the same excellent playability. There’s also a CD-60SCE version with a cutaway and electronics if you want to plug in.
The Yamaha FG800 has been one of the most recommended beginner acoustic guitars for years. Like the CD-60S it has a solid spruce top at a budget price, Yamaha’s scalloped bracing system for improved resonance, and a tone that genuinely punches above its price point.
What players actually say: This is where we have to be honest with you — the FG800 has a known action inconsistency problem. Many players report great action straight out of the box. But a significant number of buyers report action of 4-5mm at the low E string, which is high enough to make playing genuinely difficult and uncomfortable. One beginner player on a guitar forum documented receiving an FG800 with 4.5mm action straight out of the box and having to replace the saddle and file the nut to get it to a playable 2.5mm. This is not universal — plenty of FG800s ship with perfectly comfortable action — but it’s a real enough issue to flag.
The tone when set up correctly is outstanding for the price. Yamaha’s scalloped bracing gives it a fuller, louder sound than most guitars at this level. If you buy from a store and can play it first, the FG800 at its price is exceptional value. If you’re buying online, be aware that a setup may be needed.
Who this suits: Players who prioritise tone and value and are either able to try the guitar in person before buying, or are comfortable getting a basic setup if needed.
Worth knowing: The urea nut and saddle are the weak point of this guitar. Upgrading to bone ($20-30 in parts, plus tech labour) noticeably improves the tone and is worth doing once you’re comfortable with the guitar.
3. Taylor Academy 10 — Best Premium Beginner Option
The Taylor Academy 10 sits at a higher price point than the other guitars on this list but deserves inclusion because it solves the beginner playability problem better than almost anything else available. Taylor built this guitar specifically for new players — not as a budget version of an existing model, but as a purpose-designed beginner instrument.
The shorter 24.875″ scale length means less string tension, which makes fretting easier and bending less demanding. The neck is slim and fast. The action from the factory is consistently low — Taylor’s quality control is significantly better than budget brands. And the beveled armrest is a genuinely useful ergonomic feature that makes long practice sessions more comfortable, something you find on much more expensive guitars.
What players actually say: The consistent verdict is that this guitar feels and plays far better than its price suggests. Guitar World described the Academy Series as guitars that can “inspire and go the distance with a guitarist from bedroom to stage.” Premier Guitar noted that the setup and intonation were excellent out of the box. Players who’ve compared it directly to the CD-60S and FG800 note a clear step up in feel and playability, with the Taylor neck profile in particular drawing praise. The tone is bright and clear — very much the Taylor character — which suits players who like a defined, articulate acoustic sound.
Who this suits: Beginners who want to invest properly in their first guitar and not upgrade for several years. If budget allows, this is the best starting point on this list.
Worth knowing: The Academy 10 does not have electronics. If you want to plug in, look at the Academy 10e which adds a Taylor ES-B pickup system.
4. Ibanez PC12MH — Best for Players Who Want a Smaller Body
Ibanez has a strong reputation for low action across their entire guitar range — it’s one of the things they consistently do well. The PC12MH is their grand concert body acoustic at an affordable price, and it delivers the low, comfortable action Ibanez is known for.
The grand concert body is smaller than a dreadnought — narrower waist, shallower depth — which makes it more comfortable for players with smaller frames, children, or anyone who finds a full-size dreadnought awkward to hold. The okoume construction (top, back and sides) produces a warm, woody tone that’s particularly good for fingerpicking and softer playing.
What players actually say: The PC12MH gets consistent praise for its playability. Ibanez’s factory setup is reliable and the thin neck profile makes chord transitions noticeably easier than on some competitors. The tone is warm and balanced — not as loud or projecting as a dreadnought, which is a trade-off of the smaller body, but the character is pleasant and the guitar responds well to a light touch. Players with smaller hands consistently rate it as one of the most comfortable options at this price.
Who this suits: Players with smaller hands or frames, younger players, fingerpickers, anyone who finds dreadnought guitars physically uncomfortable.
Worth knowing: The PC12MH is an all-laminate guitar — there’s no solid wood here unlike the CD-60S, FG800 and Taylor Academy 10. This limits the tonal ceiling but keeps the price down and makes the guitar more resistant to humidity changes, which matters if you live in a dry or very humid climate.
The Jasmine S34C is the budget option on this list — priced well under $100, it’s a genuine starter guitar for players who aren’t ready to commit to a bigger investment. Jasmine is a subsidiary of Takamine, which gives it more manufacturing credibility than most guitars at this price point.
The NEX body shape is a cross between a dreadnought and an orchestra model — slightly smaller than a full dreadnought with a comfortable waist that makes it easier to hold while seated.
What players actually say: For the price, the S34C consistently delivers. Players report it arrives with playable action and decent intonation — considerably better than most no-name guitars in this price bracket. The tone is limited — all-laminate construction at this price point doesn’t produce anything special — but it’s not unpleasant, and for a first guitar where the priority is building technique rather than tone, it does the job. The rosewood fingerboard is a genuine surprise at this price and gives the guitar a more premium feel than the price suggests.
Who this suits: Absolute beginners who want to try guitar before committing to a bigger purchase. Parents buying a first guitar for a child. Anyone on the tightest possible budget.
Worth knowing: At this price, build quality can be inconsistent. If buying online, read recent reviews before purchasing and make sure the seller has a good return policy.
What Is Guitar Action and Why Does It Matter?
Action refers to the height of the strings above the fretboard. It’s measured at the 12th fret — the standard measurement points are the low E string and the high E string.
As a general guide, typical low action measurements for acoustic guitar are around 2.0-2.5mm on the high E string and 2.5-3.0mm on the low E string at the 12th fret. Higher than this and the guitar starts to feel stiff and effortful. Too low and you get fret buzz — strings vibrating against the frets on adjacent positions.
For beginners, the priority is always on the higher end of low — low enough to be comfortable, but not so low that every chord produces buzz. As you develop technique and finger strength, you can adjust the action to your preference.
How To Adjust the Action on an Acoustic Guitar
If your guitar’s action is higher than you’d like, there are three places where adjustments can be made. Before attempting any of these yourself, make sure you understand the parts of a guitar — it’ll make the process much clearer.
The Nut
The nut sits at the headstock end of the neck and determines the string height at the first few frets. If your guitar feels difficult to play in the first three frets specifically, the nut slots may be too high. Lowering nut slots requires careful filing and is best left to a guitar tech unless you’re confident with a file and have a spare nut in case of mistakes.
The Saddle
The saddle sits in the bridge and is the primary adjustment point for action at the higher frets (above the 5th fret). Most acoustic saddles are removable — you can sand the bottom of the saddle to lower it, or replace it entirely. This is a relatively beginner-friendly adjustment and a common first step when a guitar’s action is high. Lowering the saddle by 1mm reduces the action at the 12th fret by approximately 0.5mm.
The Truss Rod
The truss rod runs through the neck and controls neck relief — the slight forward bow in the neck that allows the strings to vibrate without buzzing. Adjusting the truss rod affects action across the entire fretboard and is the most complex of the three adjustments. If you suspect your neck relief is wrong, we recommend taking the guitar to a tech rather than adjusting it yourself unless you know what you’re doing. Over-tightening a truss rod can crack a neck.
Frequently Asked Questions
Is low action always better?
Not always. Very low action can cause fret buzz and reduces the volume and projection of an acoustic guitar. Some experienced players — particularly those who play hard or use heavy strings — prefer slightly higher action for more dynamic headroom. For beginners, low action is almost always preferable as it makes learning significantly easier.
Can any acoustic guitar be set up with low action?
To a point, yes. Most guitars can have their action lowered by adjusting the nut, saddle, and truss rod. However, a guitar with a bowed neck, high frets, or poor fretwork may not be able to achieve low action without fret buzz regardless of how well it’s set up. This is why buying a guitar from a reputable brand matters — quality fretwork is the foundation of good action.
Should I get my new guitar set up professionally?
It’s worth considering, particularly if you’re buying online and can’t play the guitar before purchase. A basic setup from a guitar tech costs $40-70 and typically includes adjusting the truss rod, nut slots, and saddle height, plus checking intonation and fret ends. On a budget guitar it can make a dramatic difference to playability. Many experienced players consider a setup a standard part of buying a new guitar.
What is the best acoustic guitar for beginners with small hands?
The Ibanez PC12MH is a strong choice due to its grand concert body shape and slim neck profile. The Taylor Academy 10 is also excellent — the shorter 24.875″ scale length reduces string tension and makes the guitar more manageable for players with smaller hands. If budget is a constraint, the Jasmine S34C’s NEX body is more compact than a standard dreadnought and easier to hold.
If you’ve enjoyed this article, please check out our latest posts: